

Storing Inflatable Boats in Garages: Preventing Winter Damage
The question isn't simply where to store your inflatable boat during winter; it's how to store it to prevent irreversible damage. A garage offers essential shelter from the elements, but it presents a unique set of challenges. The real commercial cost isn't storage space—it's the lifecycle reduction, seam failure, and performance degradation that result from improper winterization. This guide provides a technical and commercial framework for protecting your asset, ensuring it is ready for a profitable spring season. Proper storage is a direct investment in your boat's ROI, particularly for commercial fleets where downtime and replacement costs are critical metrics.
The Garage Environment: A Double-Edged Shield
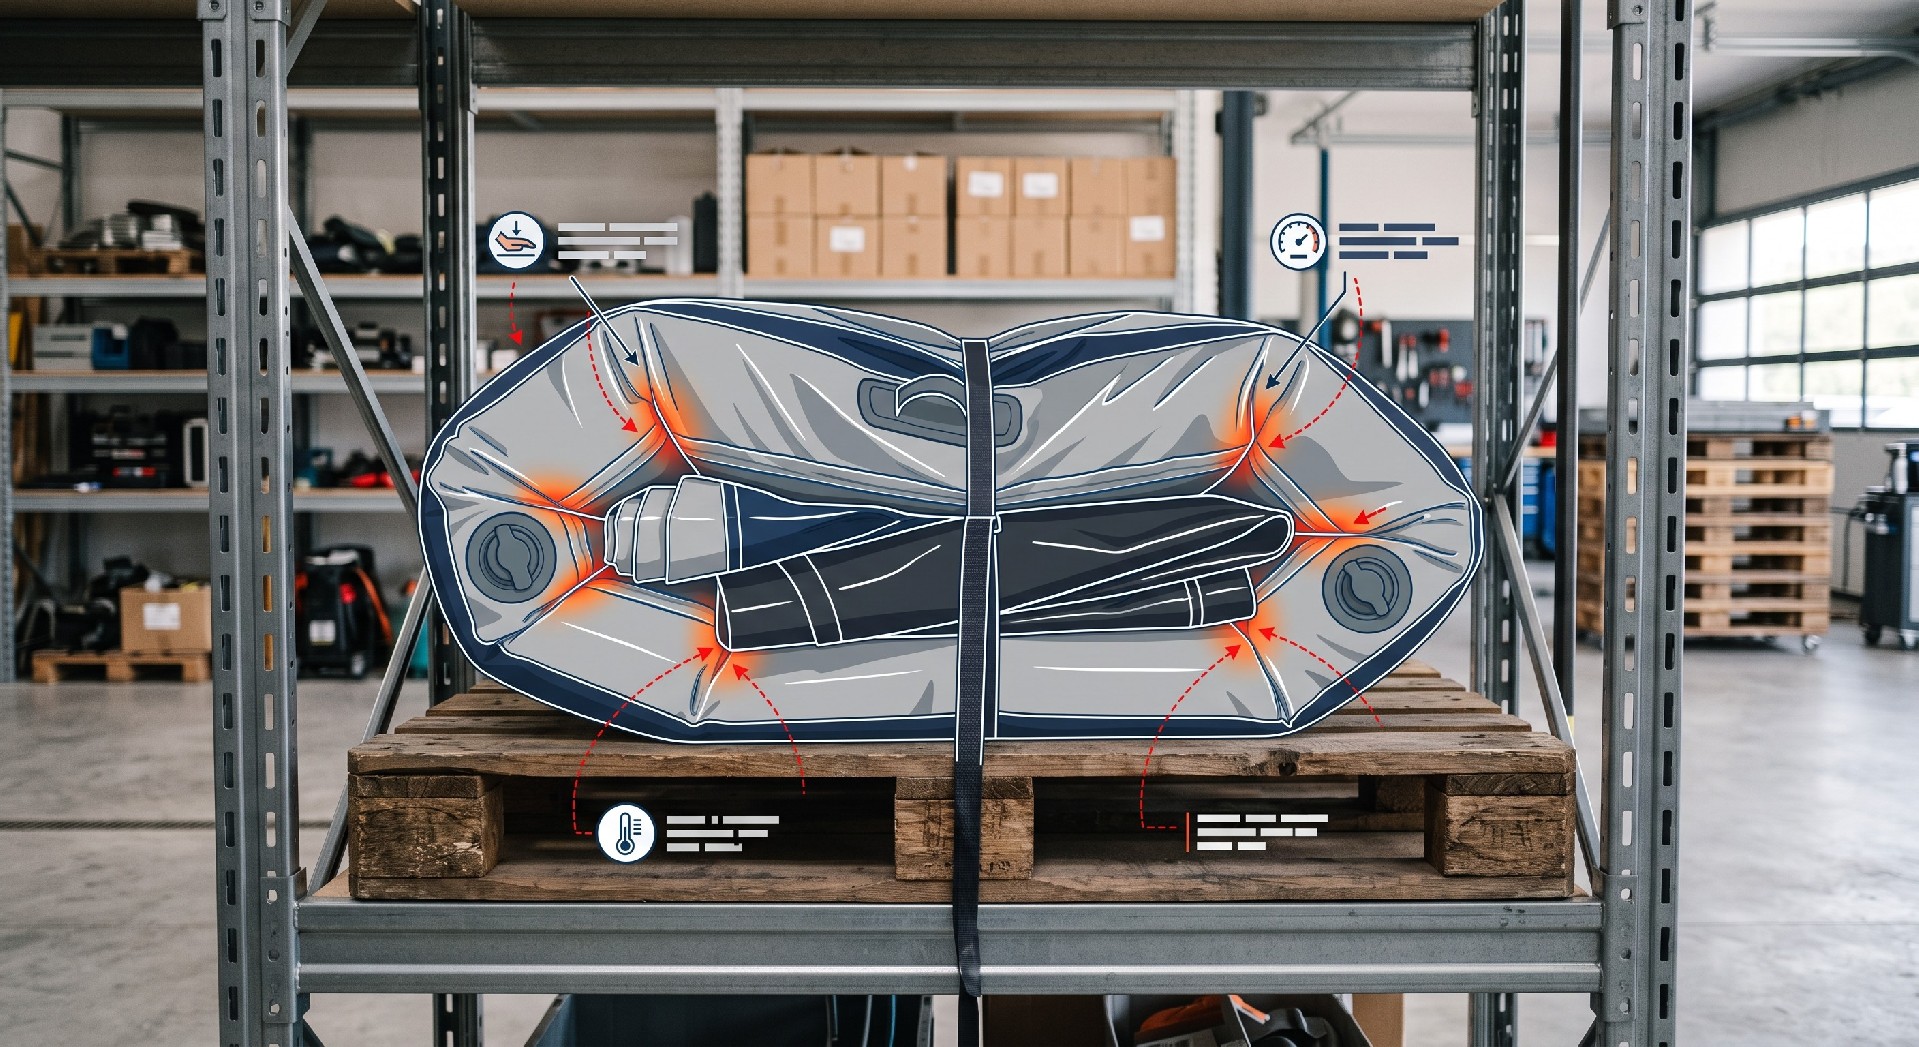
While a garage is superior to leaving a boat exposed to ice, snow, and UV rays, it's not a perfect environment. The three primary threats are temperature fluctuations, humidity, and physical space constraints.
Thermal Cycling Stress
Garages experience significant temperature swings as they are rarely climate-controlled. This constant thermal cycling is the enemy of modern inflatable materials like PVC and Hypalon/CSM. As temperatures drop, the material can become more rigid and brittle, increasing the risk of cracking, especially at stress points like seams and tube creases. Conversely, a sudden rise in temperature can cause the air inside the boat to expand, potentially overstressing the seams and creating micro-tears. The key is to manage the stored pressure carefully.
Humidity and Its Consequences
Moisture is a primary catalyst for mold, mildew, and corrosion. In colder months, condensation can form on the boat's surface and its internal components, particularly if the boat is stored before it is thoroughly dry. This can lead to fabric degradation, corrosion of metal D-rings and valves, and electrical issues in any integrated electronics. A garage floor, especially a concrete one, can radiate ground moisture upward, compounding the problem.
Space and Physical Deformation
Garages are multifunctional spaces, and inflatable boats can be awkwardly shaped. Storing them with heavy items stacked on top, or pinched against a wall, can cause permanent deformation, creases, and stress damage to the material. The storage environment must prioritize the boat's integrity above all else.
Comprehensive Storage Procedure
This is not merely a checklist; it is a systematic commercial protocol to preserve your asset. The process is divided into two distinct phases: deflation and cleaning, followed by storage preparation and positioning.
Phase 1: Preparation and Cleaning
A boat stored dirty is a boat that deteriorates. Salt, sand, dirt, and organic matter are abrasive and provide nutrients for mold. Begin by thoroughly cleaning the boat with a manufacturer-approved, mild, non-abrasive soap and fresh water. Rinse it meticulously, paying special attention to seams and folds where dirt can become trapped. Allow the boat to dry completely and I mean completely. Any residual moisture is an invitation for mildew. This can take several days depending on the climate; using a leaf blower or a commercial-grade air mover can accelerate the process. Once dry, inspect the boat for damage. This is the ideal time to identify and repair any small punctures or seam issues before they become larger problems. Applying a protective UV-inhibiting coating, if the manufacturer recommends it, is a prudent step for long-term protection.
Phase 2: Deflation, Folding, and Storage
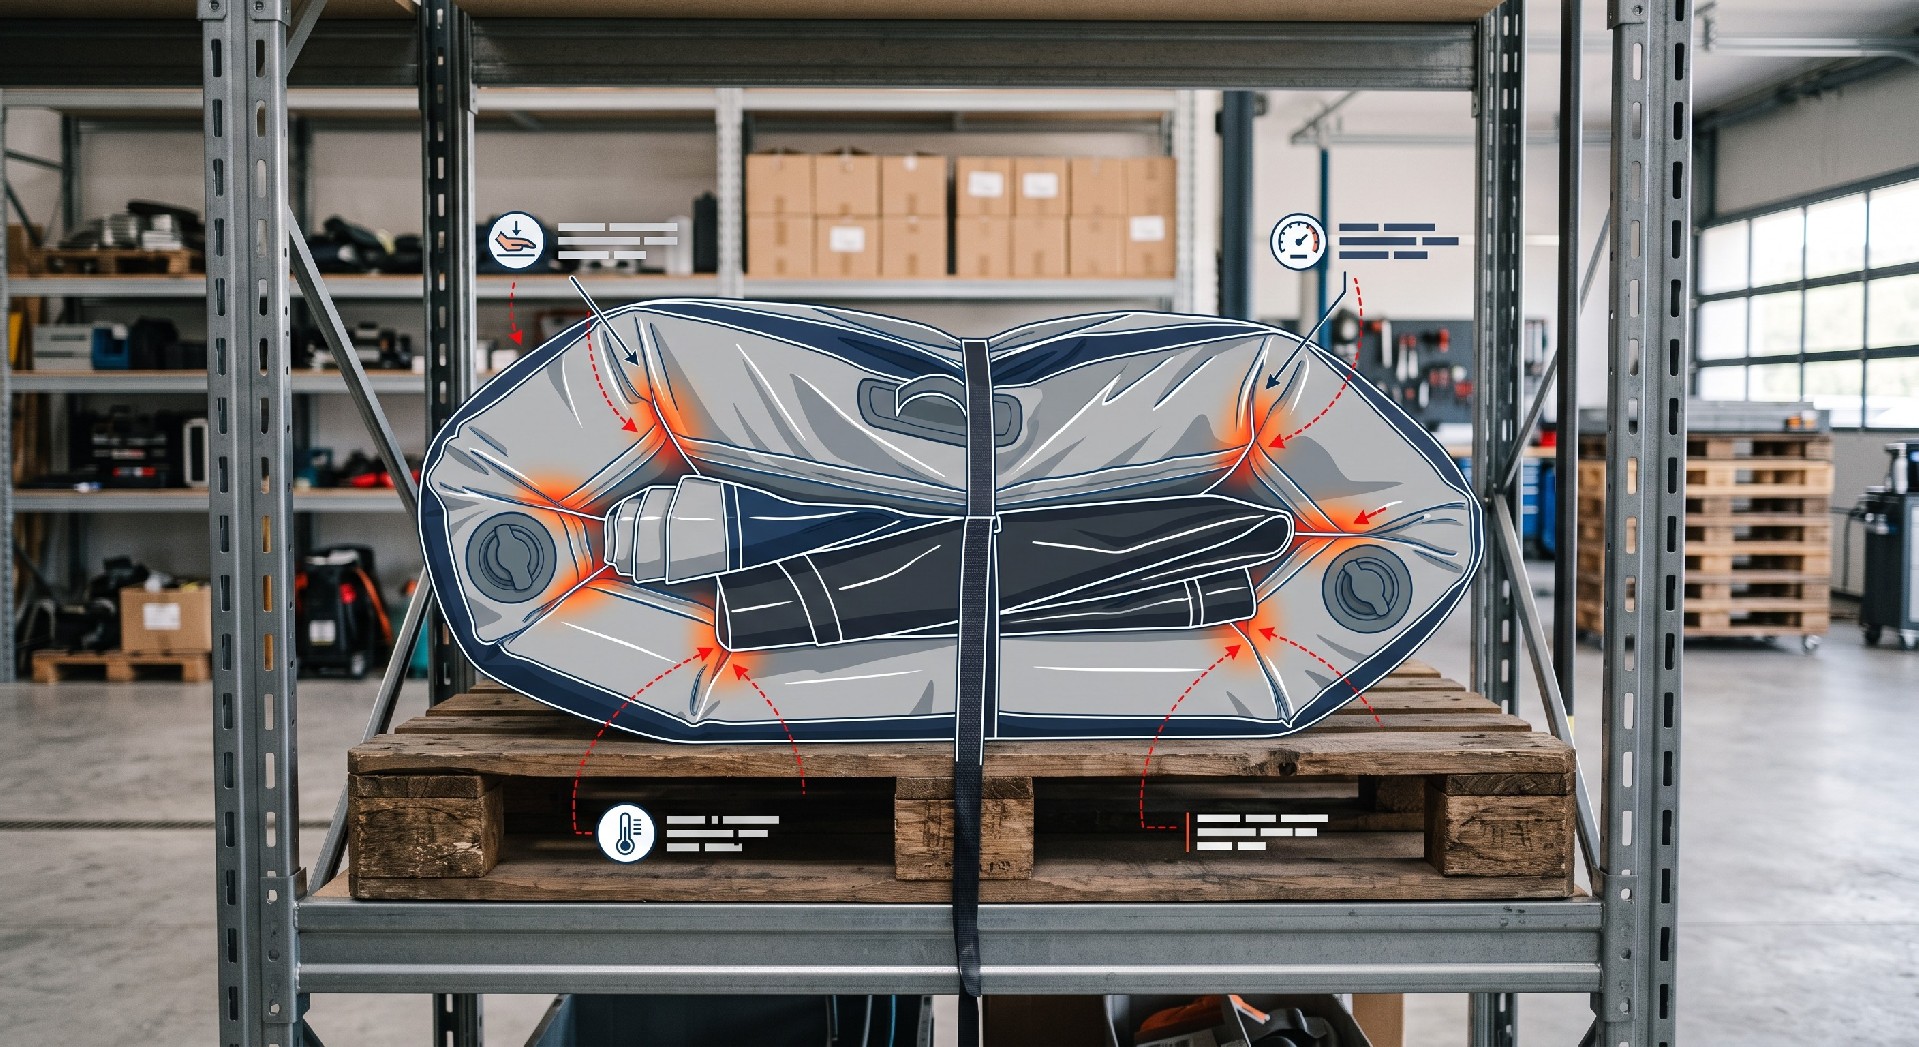
Once the boat is clean and dry, the next step is deflation. Never store the boat fully inflated. This puts constant stress on the seams and material. However, avoid complete vacuum-packing. It is generally recommended to leave a small amount of air in the boat, perhaps just enough for it to hold its basic shape. This helps prevent the tube fabric from sticking to itself and creating stress points during freezing. The boat should be folded, not rolled. Rolling can cause creases and damage to the floor and tube material. Folding, especially along existing creases, is far gentler. Use plastic storage bags, but never seal them airtight, as this can trap moisture. The goal is to create a stable, stable environment.
For storage, always place the boat on a raised platform, such as shelving or wooden pallets, to protect it from ground moisture and temperature extremes. Concrete floors can be particularly cold and damp. If you must store it on the floor, consider placing a thick tarp or a layer of heavy cardboard as insulation.
Long-Term Monitoring and Maintenance
Storage isn't a set-and-forget operation. A regular inspection schedule is essential to catch problems early. A monthly inspection during winter should include a visual check for pests, rodents, and any signs of moisture, mildew, or physical damage. Check the valves to ensure they are not leaking. A loss of pressure over a short period may indicate a more significant leak.
If you notice any issues, document them with photos. A commercial approach is to maintain a logbook or digital record for each boat in your fleet, documenting its maintenance history, issues discovered, and repairs performed. This data is invaluable for tracking lifecycle costs and making informed decisions about repair versus replacement.
| Inspection Point | Failure Signal | Service Action | Retirement Trigger |
|---|---|---|---|
| Seams and Tube Folds | Cracks, rigidness, or delamination in material | Apply manufacturer-approved sealant or perform a patch repair | Multiple seam failures or extensive, deep cracking impossible to seal reliably |
| Valves | Visible cracks in the valve body or an inability to hold pressure | Tighten valve core, replace the seal, or replace the entire valve assembly | Valve body is cracked or the mounting flange is compromised |
| D-rings and Attachment Points | Corrosion, rust, or separation of the D-ring from the mounting patch | Clean with a wire brush (if metal) and re-apply adhesive if the patch is lifting | Complete separation from the boat or severe corrosion that affects the structural patch |
| Floor Material | Brittleness, cracking, or loss of stiffness | Apply a protective coating if appropriate, or prepare for a floor panel replacement | Significant structural damage to the floor, making it unsafe for use |
Commercial Implications
For rental fleets or commercial operators, the economic implications are clear. A boat that is damaged during winter storage incurs two costs: the cost of repair (or replacement) and the opportunity cost of lost rental revenue during the peak season. A well-defined winterization and storage protocol is a risk management strategy. It reduces unplanned downtime and extends the service life of the asset. This is a key component of calculating the total lifecycle cost of a commercial inflatable boat.
For example, a fleet of 10 boats, each with a replacement value of $5,000, represents a $50,000 asset. If improper storage reduces the average service life from five years to three years, the cost of the error is an additional $20,000 in capital expenditure over that period, not including repair costs and lost revenue. A structured storage process is a direct investment in your profitability.
When to Repair, When to Replace
Even with perfect storage, components will eventually age. A key commercial decision is knowing when a repair is economically viable and when it is time to replace the boat. This is a data-driven decision. Track the total cost of repairs over time. If the cost of a major repair (e.g., a seam replacement) exceeds a certain percentage of the replacement value, typically around 60-70%, it is often more prudent to invest in a new boat.
Similarly, if the boat's structural integrity is compromised, or if it suffers damage to a critical structural chamber, the cost and complexity of the repair may render the boat unviable. Always weigh the repair cost against the expected remaining service life. Remember, a boat with a history of multiple repairs is more likely to fail again.