

Why Saltwater Crystals Are a Commercial Maintenance Problem
For commercial inflatable boat accessories—such as towable rings, inflatable fenders, deck floats, or SUP leashes—saltwater crystal formation is not merely a cosmetic issue. When seawater evaporates from PVC, Hypalon/CSM, or TPU surfaces, it leaves behind a concentrated residue of sodium chloride and other mineral salts. Over time, these crystals abrade surface coatings, accelerate UV degradation, wick moisture into seams, and can cause valve seal failure. For rental fleets and commercial operators, the cost of premature accessory replacement due to salt damage often surpasses the initial purchase price within two seasons. This article provides a technical, step-by-step protocol for safely removing saltwater crystals from inflatable boat accessories, tailored for fleet maintenance managers and commercial procurement teams.
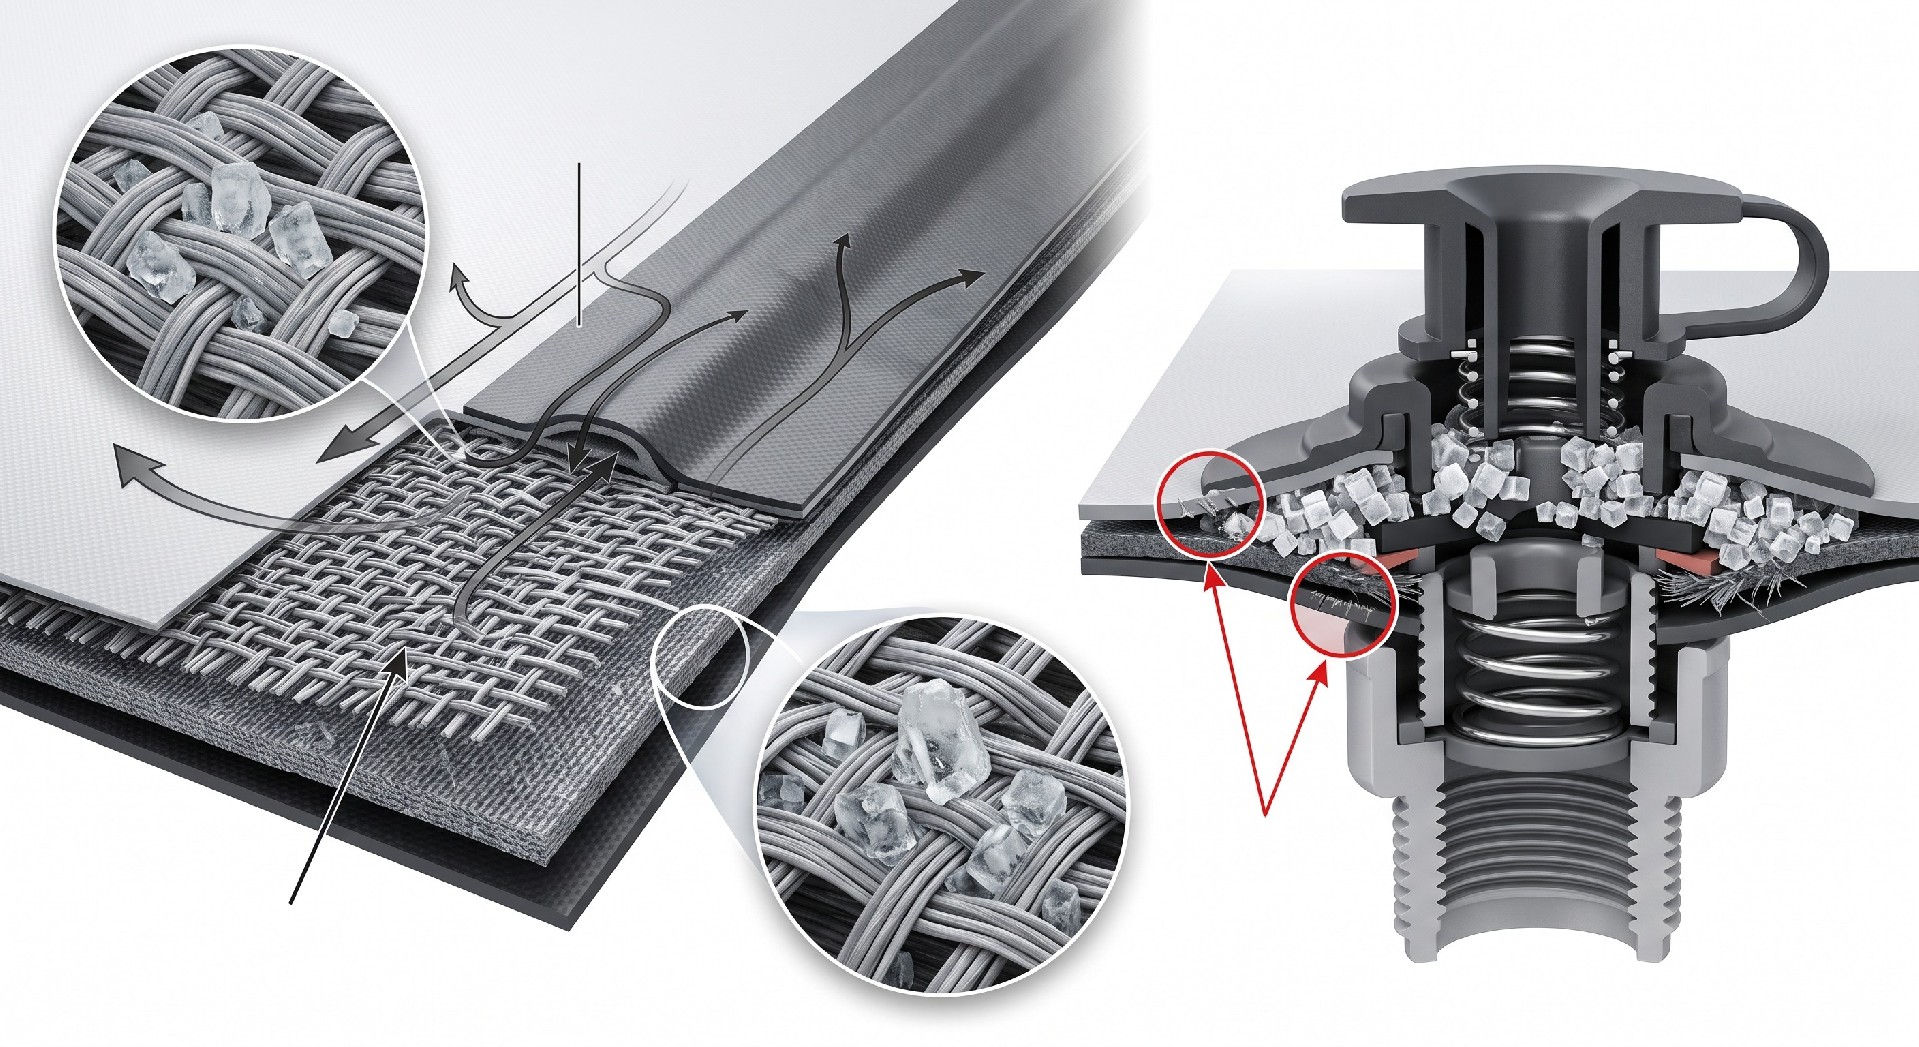
Understanding the Damage Mechanism: Why Salt Crystals Are Not Just Surface Dirt
Salt crystals form through a process known as efflorescence, where dissolved salts are transported to the surface of the material as water evaporates. On inflatable accessories, these microscopic crystals are sharp and abrasive. When an accessory is rolled, folded, or rubbed during handling, the crystals act as an abrasive medium, wearing down the topcoat of PVC or Hypalon. This abrasion exposes the base fabric to UV radiation, leading to cracking and loss of tensile strength. More critically, salt crystals can accumulate around valves and seam edges. As the accessory is deflated and packed, these crystals are forced into the valve mechanism, potentially damaging the sealing surface and causing slow leaks. For commercial operators, the typical failure mode is not a catastrophic blowout, but a gradual loss of working pressure that reduces performance and increases downtime for re-inflation.
Key Technical Terms
Efflorescence: The migration of dissolved salts to a material's surface as moisture evaporates.
Hypalon/CSM: Chlorosulfonated polyethylene, a synthetic rubber commonly used for high-end inflatable boat accessories due to its chemical and UV resistance.
Hydrolysis: A chemical reaction with water that can degrade polyurethane-based adhesives used in seam construction.
Required Materials for a Commercial Salt-Removal Protocol
For a commercial fleet operation, effective salt removal requires specific materials that are both effective and safe for the accessory's material. Avoid household soaps or detergents with aggressive degreasers, as they can leach plasticizers from PVC or degrade the adhesive bonds in seam tape. The following commercial-grade materials are recommended:
Fresh Water Supply: Deionized or demineralized water is preferred to prevent introducing new minerals. If using tap water, ensure it is not hard water.
Mild Soap: A pH-neutral marine soap, such as a non-abrasive boat soap (e.g., Star brite or 303 Multi-Surface Cleaner).
Non-Abrasive Sponges and Cloths: Soft cellulose sponges and microfiber cloths to avoid scratching the surface.
Soft-Bristle Brushes: For textured surfaces or hard-to-reach areas like valve recesses.
Commercial Rinse Aids: A sheeting agent to reduce water spots and aid in drying.
Protective Gloves and Eye Protection: For operator safety when handling cleaning agents.
Step-by-Step Cleaning Protocol for Inflatable Boat Accessories
This protocol is designed for commercial settings where efficiency and thoroughness are paramount. The process assumes the accessory is deflated and laid out on a clean, non-abrasive surface.
Step 1: Dry Dusting
Before introducing water, use a soft-bristle brush to remove loose salt crystals and dry sand. This prevents scratching during the wet cleaning phase. Pay particular attention to folds and seam junctions where crystals accumulate.
Step 2: Rinsing
Rinse the entire accessory with a gentle stream of fresh water. Do not use high-pressure washers; the force can drive salt crystals deeper into seams or damage the fabric. The goal is to dissolve and carry away the bulk of the surface salt.
Step 3: Washing
Apply a diluted solution of pH-neutral marine soap (follow the manufacturer's dilution ratio, typically 1:10 to 1:20). Use a soft sponge to gently clean the surface. For textured non-slip areas, a soft-bristle brush may be used with light pressure. Work in sections to ensure the cleaning solution does not dry on the surface, which can leave residue.
Step 4: Thorough Rinsing
Rinse thoroughly again with fresh water. This is the most critical step. Incomplete rinsing leaves soap residue, which can attract dirt and degrade the material over time. Inspect the water runoff; it should run clear and not show signs of suds. For a commercial fleet, a two-person team can significantly speed up this process, with one washing and the other rinsing.
Step 5: Drying
Allow the accessory to air-dry completely in a shaded, well-ventilated area. Do not dry in direct sunlight, as UV rays can damage the material when wet. If the accessory is to be stored inflated, ensure it is completely dry to prevent mold and mildew, which are often the next failure point after salt damage. For a fleet, a drying rack system can be a worthwhile capital investment.
| Inspection Point | Failure Signal | Service Action | Retirement Trigger |
|---|---|---|---|
| PVC/CSM Fabric | Whitish residue, surface dullness | Rinse with fresh water, wash with pH-neutral soap | Fabric feels brittle or shows cracking |
| Seam Area | Whitening or peeling of seam tape | Gently wipe with damp cloth, inspect for delamination | Visible seam delamination or leakage |
| Valve Mechanism | Stiff operation or slow leak | Clean valve seat with soft cloth, lubricate with compatible silicone grease | Valve fails pressure test (leaks > 1 PSI/hour) |
| D-ring / Hardware | Corrosion pitting or salt buildup | Rinse and dry thoroughly, apply anti-corrosion spray | Structural failure or severe pitting |
| Overall Air Retention | Pressure loss > 10% over 24 hours | Full inspection and leak test | Repair cost exceeds 30% of replacement cost |
| Top Coat | Flaking or peeling | Document and monitor | Topcoat loss exposes fabric, leading to UV damage |
Commercial Fleet Implications: Scheduling and ROI
For rental operators and commercial marinas, cleaning saltwater crystals off inflatable accessories is a preventative maintenance task. The frequency of cleaning depends on usage. A towable used daily in saltwater may need a rinse at the end of each day, while a fender or dock accessory used intermittently may require a more thorough weekly cleaning. The commercial decision often revolves around labor cost versus accessory replacement cost. A typical commercial towable accessory might cost between USD 500 and USD 2,000. A 15-minute freshwater rinse after each use costs approximately USD 3 to USD 5 in labor. Over a 60-day season, this amounts to USD 180 to USD 300 per accessory. If this rinse prevents just one replacement per season, the ROI is immediately positive. For fleet managers, a standardized cleaning log can help track maintenance intervals and correlate them with accessory lifespan.
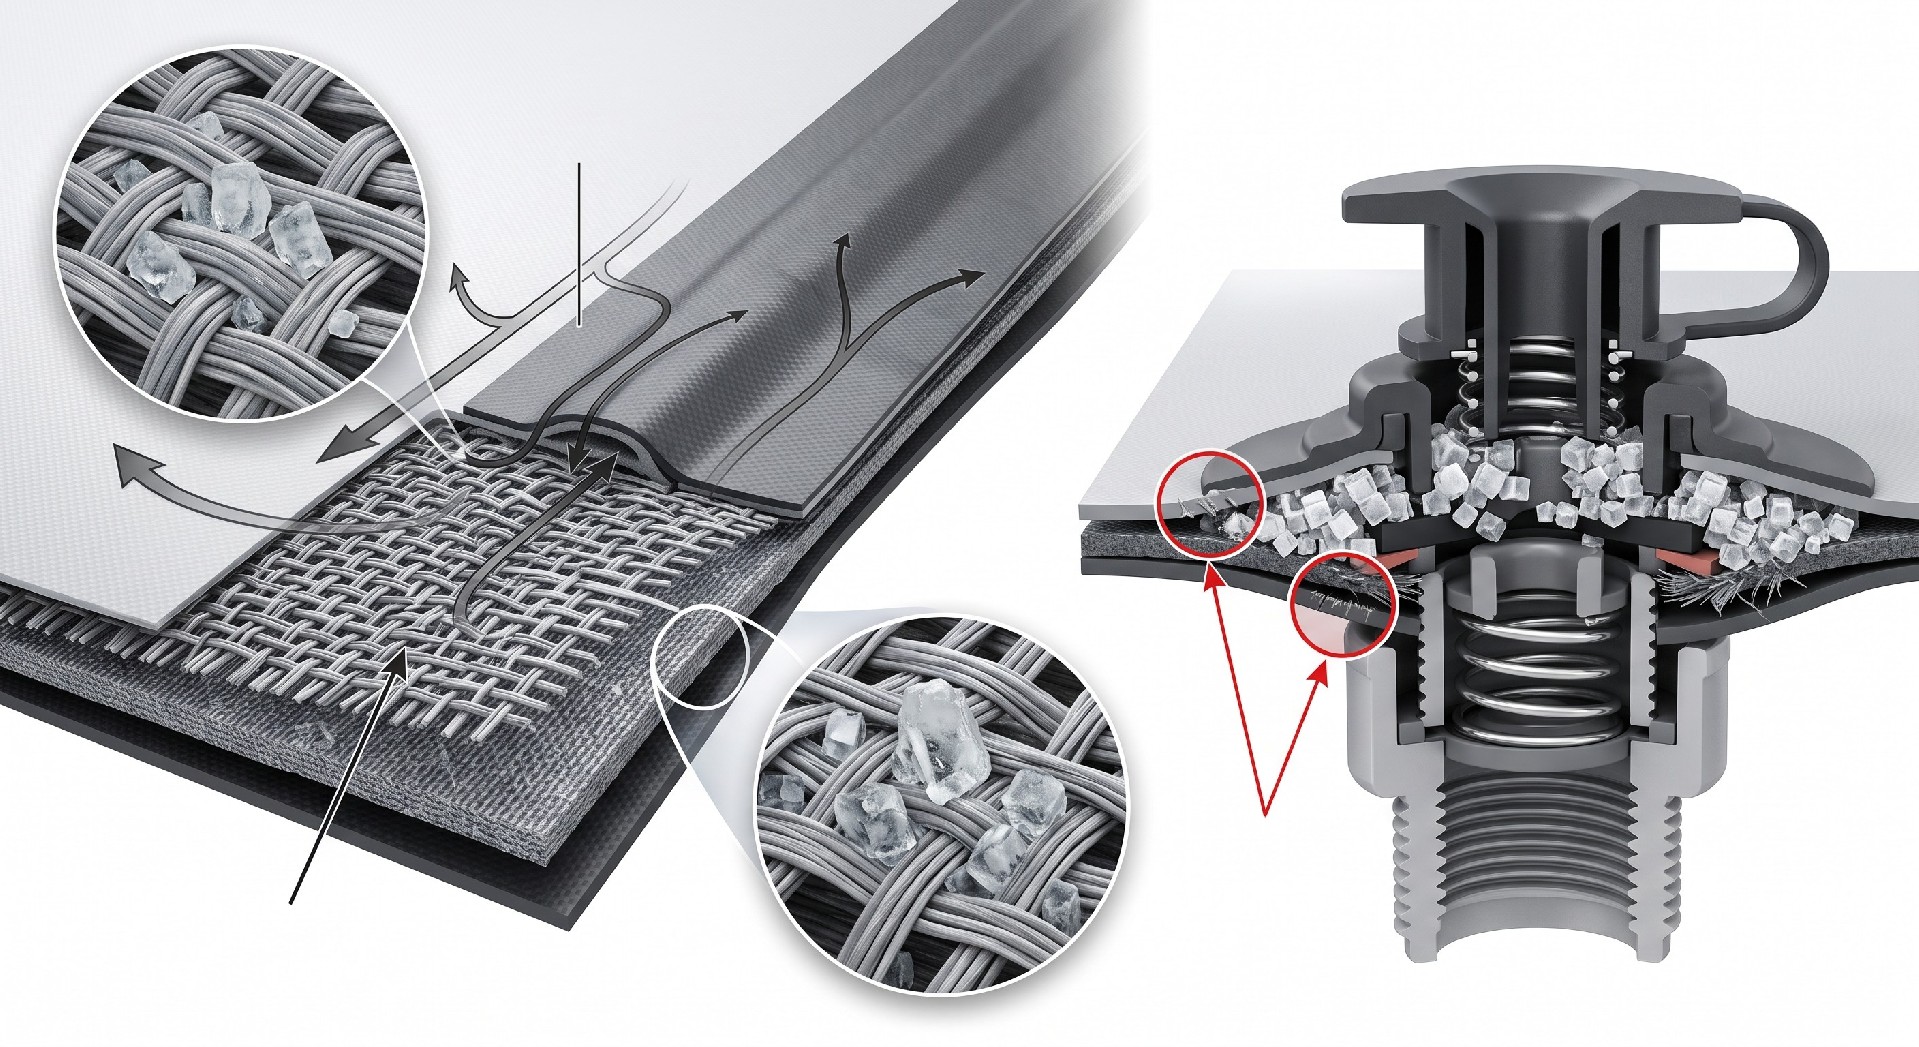
Special Considerations for Valves, Seams, and Hardware
Saltwater crystals often accumulate in the recesses of inflation valves and around D-ring attachments. These areas require special attention:
Valves: Use a soft, damp cloth to gently clean the valve seat. Do not use tools or sharp objects that can scratch the sealing surface. For valves with a Schrader or Boston valve core, ensure the core is clean and lubricated with a valve-safe silicone grease (check compatibility with the valve's material).
Seams: Pay special attention to seam tape and welded joints. Salt crystals can act as a wedge in micro-pores, increasing the risk of hydrolysis and delamination over time. A gentle wipe along the seam line with a damp cloth is recommended. If the seam shows signs of whitening or cracking, this may indicate salt-induced stress and should be inspected more thoroughly.
Hardware: D-rings, grommets, and tow points are often made of stainless steel or brass. While these are corrosion-resistant, salt deposits can still cause pitting. Rinse these areas thoroughly and ensure they are dried. A light application of a marine-grade anti-corrosion spray on hardware can extend its service life, but ensure it does not come into contact with the fabric.
When to Retire Accessories: Salt Damage as a Leading Indicator
The decision to retire an inflatable accessory should not be based solely on aesthetic appearance. Saltwater crystal accumulation, if inadequately cleaned, leads to a set of performance degradations. For commercial buyers, these are leading indicators of end-of-life:
Material Stiffness: If the fabric becomes stiff or brittle, particularly in areas of heavy salt exposure, this indicates plasticizer loss or UV degradation accelerated by salt abrasion.
Pressure Loss: If an accessory consistently loses more than 10% of its working pressure (e.g., from 3.6 PSI to 3.2 PSI) over a 24-hour period and all valves are tight, it suggests micro-leaks in the seams caused by salt crystal abrasion.
Coating Delamination: If the topcoat begins to flake or peel, especially along seam edges, the accessory is likely beyond economic repair for a commercial fleet.
Choose when to replace: If the cost of repeated repairs or the labor cost of frequent re-inflation exceeds 30% of the replacement cost of a new accessory, it is economically more efficient to replace the unit. This is a key commercial decision for fleet expansion and lifecycle optimization.
Preventive Measures for Commercial Operators
Prevention is always more cost-effective than cure. Commercial operators should consider the following:
Immediate Post-Use Rinse: Implement a standard operating procedure to rinse all saltwater-exposed accessories as soon as they are removed from service. This prevents the efflorescence process from even starting.
On-Water Rinse Kits: For larger boats, consider installing a freshwater rinse system at the dock to quickly spray down accessories before they are packed away.
Storage Conditions: Store accessories in a cool, dry, and dark environment. Avoid storing in humid areas, as residual moisture can continue to cause salt crystallization even after cleaning.
Material Selection for New Purchases: When specifying or ordering new accessories, opt for materials with higher resistance to saltwater. For example, Hypalon/CSM offers better chemical resistance than PVC for extreme saltwater use, though it comes at a higher price point. This is a critical specification to discuss with the OEM brand owner or manufacturer.
Commercial Decision Checklist: Saltwater Maintenance Protocol
For procurement teams, maintenance managers, and OEM buyers, this checklist should be integrated into the operator's manual and maintenance contract:
Designate a saltwater accessory cleaning area with fresh water access.
Stock pH-neutral soap, soft sponges, and microfiber cloths.
Train staff on the five-step cleaning protocol (Dry Dusting, Rinsing, Washing, Thorough Rinsing, Drying).
Implement a cleaning log for each accessory to track maintenance history.
Inspect valves and seams weekly for signs of salt crystal accumulation or damage.
Establish a retirement trigger based on pressure loss or material stiffness.
For new accessory orders, specify saltwater resistance as a key performance criterion in the procurement documentation.
By adopting this protocol, commercial operators can significantly extend the service life of their inflatable boat accessories, reduce downtime, and optimize the total cost of ownership. The key is to treat saltwater crystal removal as a critical maintenance function, not an afterthought.