

Why Pinhole Leaks Demand a Structured Repair Protocol
For commercial inflatable equipment—whether a rental fleet of SUPs, a resort water park, or emergency rescue rafts—a pinhole air leak is more than a minor annoyance. It translates directly into revenue loss, operational downtime, and potential safety risks. The ability to quickly and accurately locate a pinhole leak using a simple soapy water solution is a fundamental, non-negotiable skill for any maintenance team. This guide provides a definitive, commercially-focused protocol for pinhole leak detection, moving beyond basic DIY advice to address the specific needs of B2B operators.
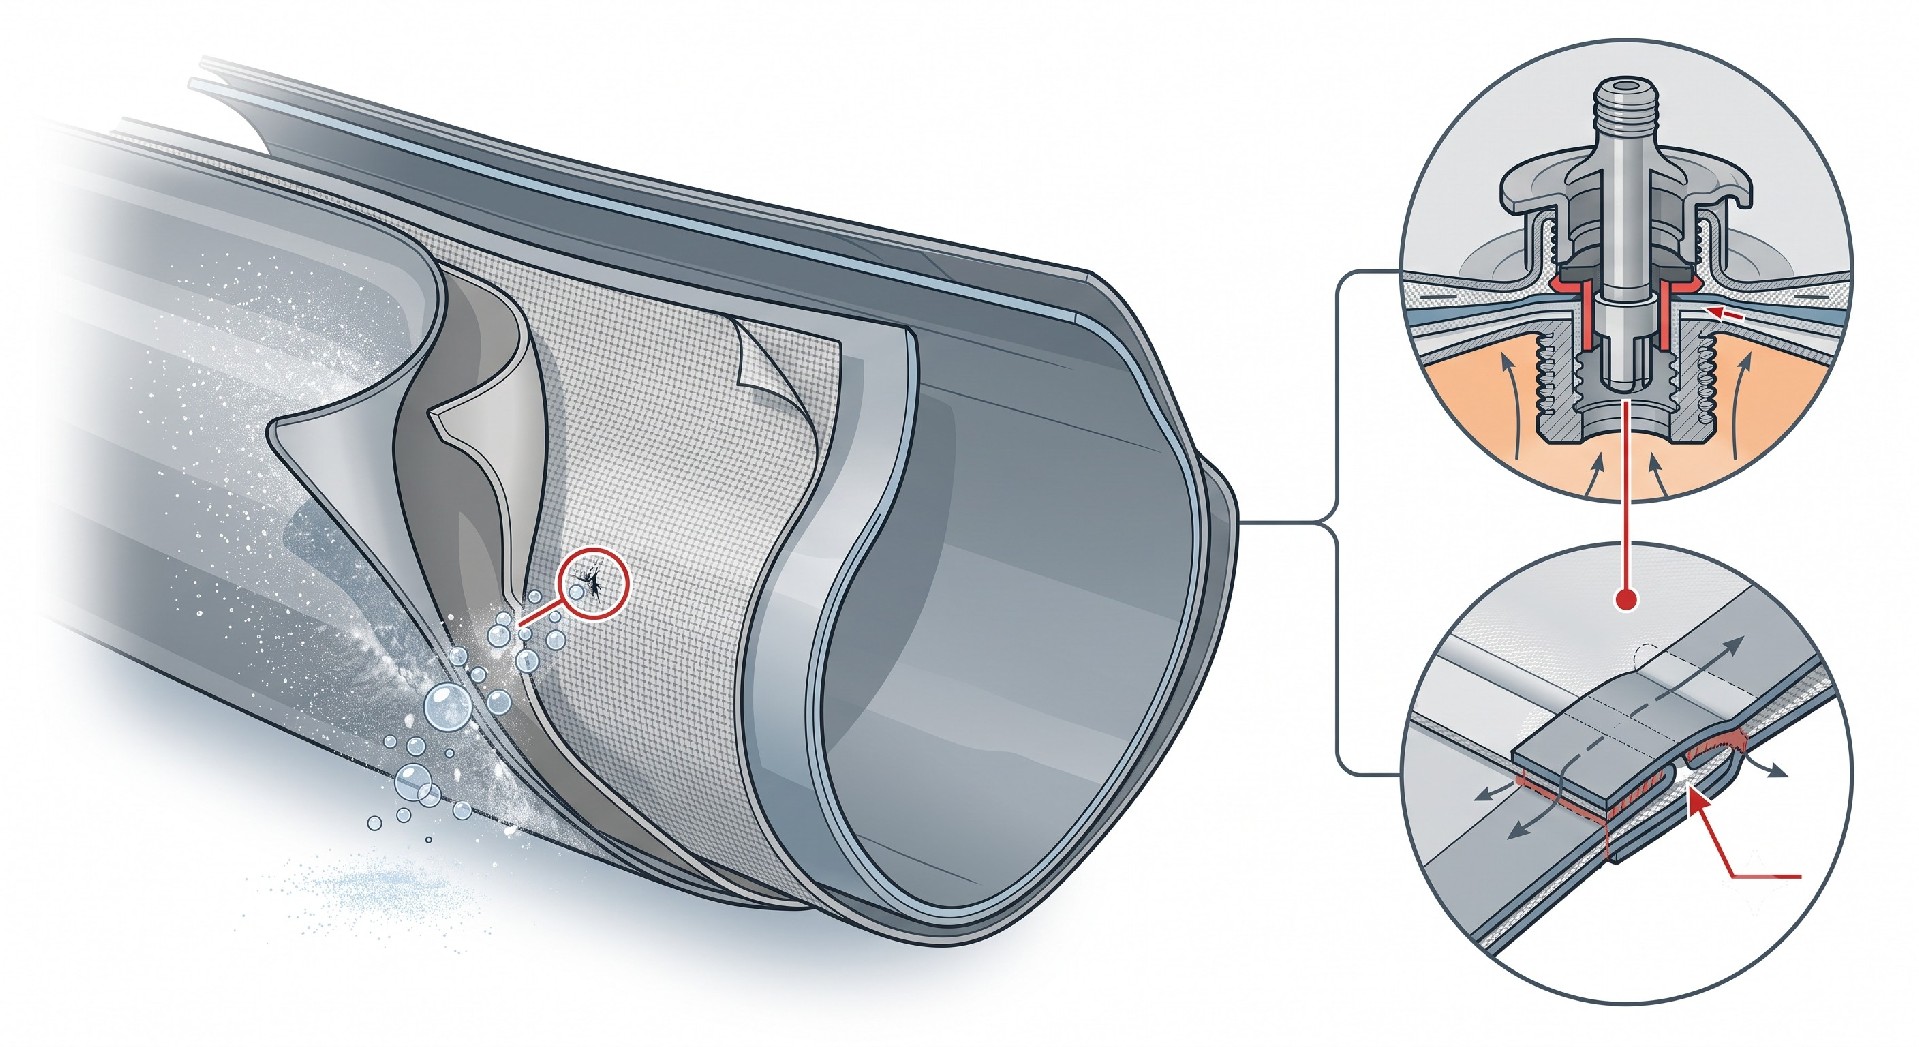
The Cost of Unrepaired Leaks: A Commercial Perspective
In a commercial setting, the impact of an undiagnosed leak compounds quickly. Consider a rental fleet of 20 inflatable kayaks. A single kayak losing pressure requires more frequent re-inflation, reducing its availability for rentals and increasing staff labor. More critically, if the leak is not identified and repaired, it can lead to product failure, customer dissatisfaction, and potential liability. For inflatable amusement structures like bounce houses, a leak in a primary air chamber can cause structural instability, posing a serious safety hazard and violating operational guidelines like EN 14960. Therefore, a systematic and efficient leak detection process is not just a maintenance task; it is a core operational and risk-management function. The goal is to minimize downtime and ensure the equipment is safe and ready for its next deployment.
The Technical Principle: Why Soapy Water Works
The technique for locating a pinhole leak with soapy water relies on a simple but highly effective physical principle. When a soapy solution is applied to a pressurized inflatable, the air escaping from a leak creates bubbles. This method is widely preferred because it is:
Highly Sensitive: Even a very slow leak, on the order of a few PSI per hour, will produce a visible stream of bubbles.
Low-Tech and Reliable: It does not require specialized electronic equipment like ultrasonic leak detectors, making it practical for field use.
Locally Precise: Unlike listening for a hiss, the bubble test pinpoints the exact location of the breach, ensuring a targeted and efficient repair.
For most commercial inflatables, which are typically made from PVC, Hypalon/CSM, or TPU and operate within a standard pressure range of 2-15 PSI for large structures and up to 25 PSI for high-pressure drop-stitch boards, this method is the industry standard for initial leak diagnosis.
Essential Tools and Materials for the Commercial Workshop
For commercial operations, having a standardized repair kit is essential. The kit should be prepared and checked regularly.
Clean Water Source: A bucket or spray bottle.
Concentrated Soap: A mild dish soap or, ideally, a leak-detection solution specifically designed for inflatables. Commercial operators often prefer a higher-visibility liquid.
Spray Bottle: For applying the solution over large areas. A pump-style sprayer is ideal for broad coverage.
Application Brushes or Sponges: For applying soapy water to seams and crevices.
Inflation Pump: To maintain pressure during the test. A rechargeable or electric pump is essential for larger items.
Reliable Pressure Gauge: To know the exact working pressure of the equipment.
Chalk or Markers: To mark potential leak sites as they are found.
Lint-Free Rags or Towels: For cleanup.
Step-by-Step Diagnostic Protocol
This is the core workflow for commercial leak detection. Every step is crucial for a thorough and efficient process.
Step 1: Preparation and Inflation
Clean the Surface: Dirt, sand, and debris can block soapy water from reaching the pinhole or create false bubbles. Clean the inflatable thoroughly, especially around seams and high-wear areas.
Inflate to Working Pressure: Inflate the product to its recommended operating pressure. This is critical; too little pressure and the leak may not be active, too much and you risk damaging the seams. For a commercial fleet, this is a non-negotiable step, as leaks often present only at full operational PSI.
Isolate the Problem: For multi-chamber products like rescue rafts or high-end SUPs, isolate chambers using valves or clamps to determine which chamber is losing pressure.
Step 2: The Bubble Test Execution
Strategic Application: Apply the soapy solution using a spray bottle for broad areas and a brush for seams and valve bases. Start from the top and work down.
Observation: Watch carefully for the formation of small, persistent bubbles. Pay special attention to high-stress areas: seams, valve bases, repair patches, and areas with visible abrasion.
Marking the Leak: Once a leak is found, mark it with chalk or a permanent marker. Do not move on until you are certain you have marked every active leak.
| Symptom / Product Class | Likely Leak Location | Diagnostic Check | Corrective Action |
|---|---|---|---|
| Slow leak on a PVC drop-stitch SUP | Pinhole in a high-wear area (e.g., bottom panel) | Inflate to 15 PSI, apply soapy water with a sprayer. Look for fine, persistent bubbles. | Mark, rinse, dry, and apply a high-quality PVC patch kit. |
| Pressure loss in a multi-chamber rescue raft | Valve base on a specific chamber | Isolate chamber, inflate. Apply soapy water around the valve base and neck. | Tighten the valve core or replace the valve assembly if the leak is at the seal. |
| Rapid deflation in a commercial bounce house | Seam tape failure or puncture | Inflate and listen for a hiss. Apply soapy water to all seams and impact areas. | For a seam failure, repair with a high-strength, compatible adhesive patch. Consider professional re-welding for a permanent fix. |
| Intermittent leak on a hypalon inflatable boat | Small crack in floor material near a hard point | Inflate to working PSI. Apply soapy water and flex the area. Bubbles will appear only when flexed. | Clean, roughen, and apply a two-part hypalon repair patch. Rinse to prevent contamination. |
| Consistent pressure drop in a fishing float | Near the valve or under a glued-on D-ring | Apply soapy water around the D-ring base. | If leak is under the D-ring, consider removing and re-gluing the D-ring over a patch. |
Step 3: Post-Detection Protocol
Release Pressure and Rinse: After identifying all leaks, release the air from the inflatable. Rinse the entire product thoroughly with clean water to remove all soap residue, which can be corrosive or cause UV degradation over time.
Dry and Repair: Allow the area around the leak to dry completely before beginning the repair process. A proper repair is only as good as the surface preparation.
Advanced Diagnostics and Troubleshooting
For commercial operators, sometimes the simplest method isn't enough. Here are more nuanced scenarios and their solutions.
Slow Leaks vs. Fast Leaks
A fast leak is often audible and easy to find. A slow leak, losing 1-2 PSI over a few hours, can be insidious. For slow leaks, ensure the inflatable is fully inflated to its working pressure and consider using a more concentrated soap solution. If the leak is so slow that bubble formation is minimal, you may need to apply the soapy water and wait for up to a minute, observing the area under bright light. This is where experience matters.
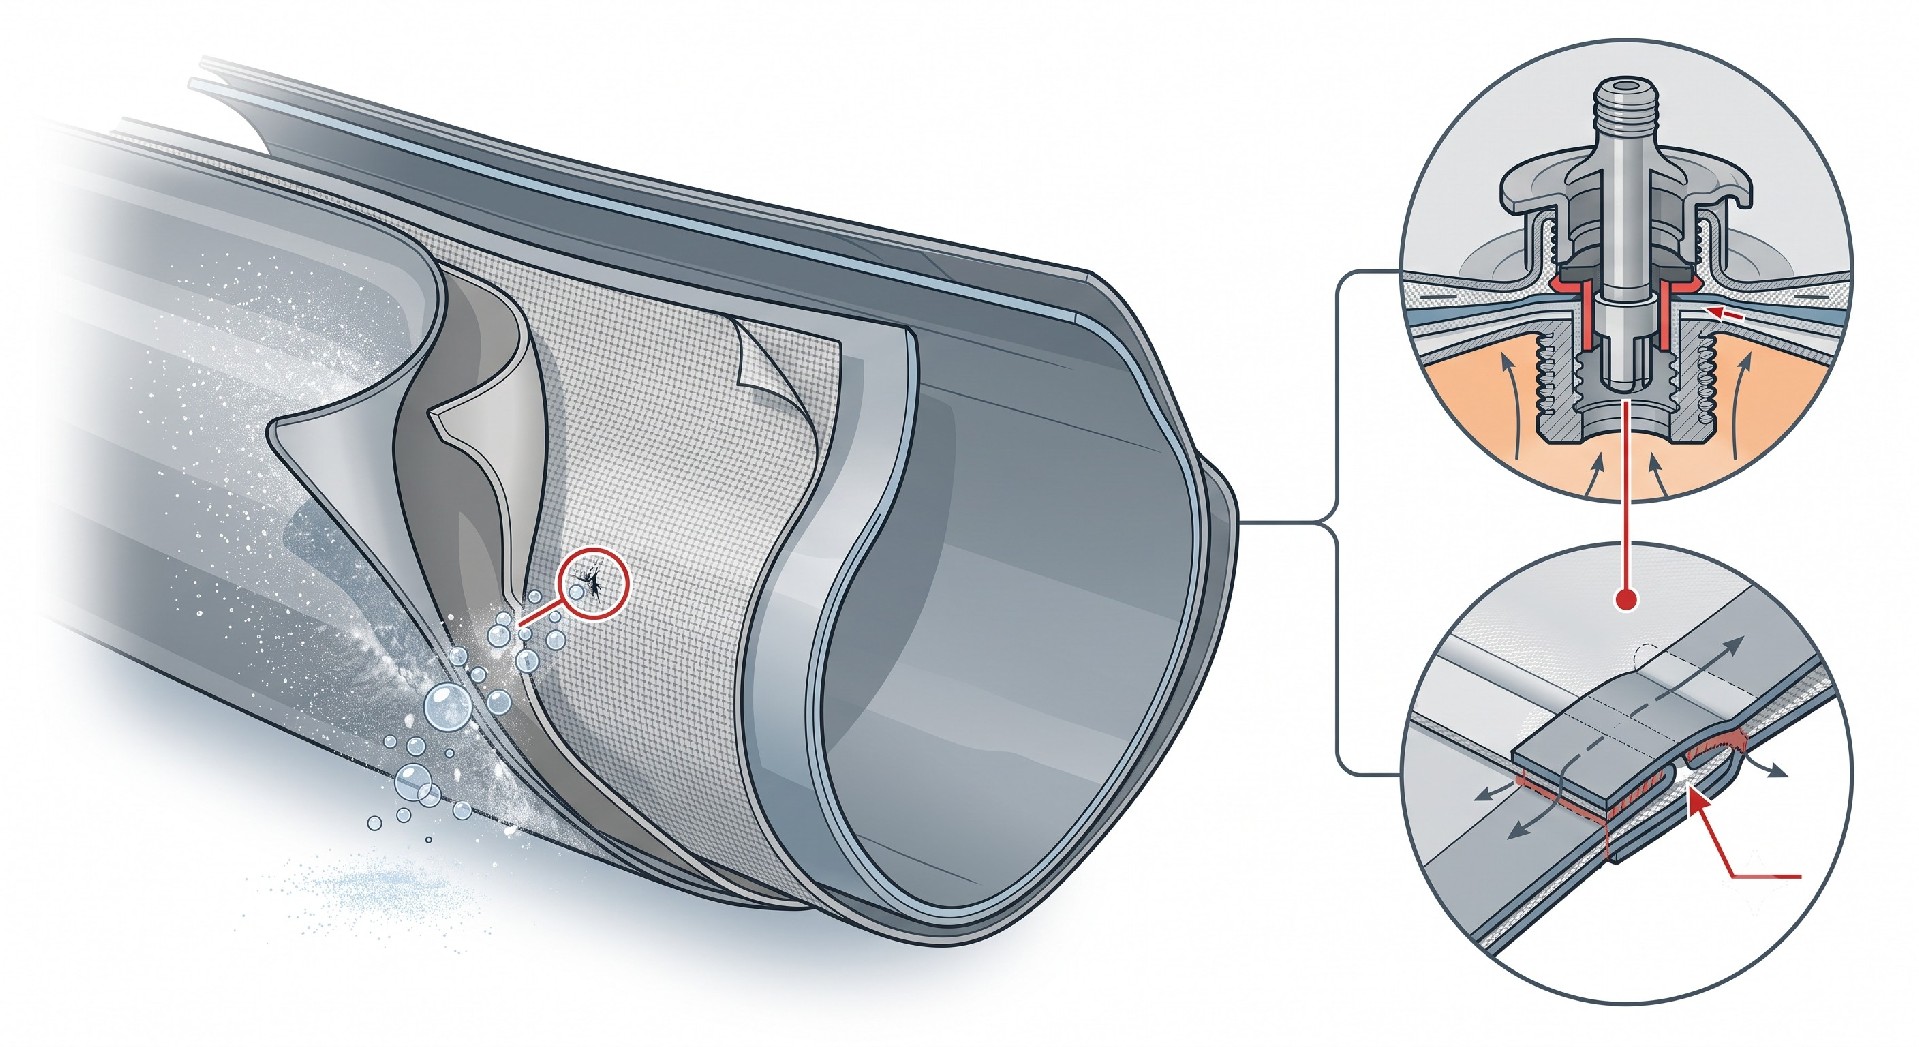
Valves and Seams: The Primary Suspects
Statistically, most leaks occur at valves or seams. For valves, pay close attention to the base of the valve where it welds to the fabric. A hairline crack here will often produce bubbles. For seams, look for areas where the seam tape is lifting or where there is visible wear. A common commercial decision is to proactively reinforce seams or replace valve bodies as part of a scheduled maintenance program, rather than waiting for a failure.
Chasing Intermittent Leaks
Some leaks are temperature-sensitive. A material may contract in cold water, opening a micro-crack that seals when warm. If you suspect this, perform the bubble test in the conditions the product is used in. This is a crucial consideration for rental operations in varying climates.
Commercial Implications and Workflow Integration
Integrating the soapy water leak test into your commercial operation requires a systematic approach.
The Fleet Inspection Schedule
A schedule prevents small issues from becoming major failures. Here is a recommended protocol:
Post-Use Inspection (Daily): A rapid visual check and a squeeze test for pressure.
Weekly Pressure Test: Inflate to full PSI and let stand for 1-2 hours to check for pressure drop.
Quarterly Full Leak Test: A complete bubble test on the entire fleet.
Repair vs. Replace Decision
Not every leak is worth repairing commercially. A single pinhole in a large drop-stitch chamber can be repaired in 30 minutes, keeping that $2,000 SUP in service. However, if a leak is found on a heavily worn seam or in a structurally critical area, the repair may be temporary. In these cases, the commercially sound decision is to decommission the product or replace the affected component. The cost of a potential failure on the water or at an event far outweighs the cost of a new product.
Buyer's Decision Checklist: Leak Prevention and Management
For procurement or fleet management teams, ask these questions before your next purchase:
What is the seam construction? Welded seams are generally more reliable than glued seams.
What is the material thickness and quality? A heavier denier fabric (e.g., 1000D vs. 500D) offers better abrasion resistance.
What is the supplier’s warranty? Does it cover seam failures or material defects?
Are replacement valves and repair patches readily available? This is vital for lifecycle management.
By adopting a structured, systematic approach to leak detection and repair, you transform a reactive maintenance hassle into a proactive, cost-saving operational strategy. The humble soapy water test, when executed with commercial rigor, remains the most reliable, efficient, and cost-effective tool in any equipment manager's arsenal.